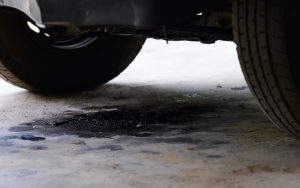
Have you ever noticed those stubborn, sticky spots on your car after parking under a tree? Tree sap can be a real nuisance, detracting from your vehicle’s appearance and potentially damaging the paint if left untreated. You’ll want to gently wash the area with warm soapy water to remove any loose dirt and debris.
But what if the sap doesn’t come off with a simple wash? The right technique and product can make all the difference, and you might be surprised by some household items that can be repurposed to tackle this sticky foe. Let’s explore how you can restore your car’s pristine condition with clever cleaning hacks.
Initial Cleaning Process
To begin removing tree sap from your vehicle, thoroughly wash it to eliminate dirt and debris, focusing specifically on the sap-stained areas. This initial cleaning process is essential in preparing your car for further treatment and ensuring that you work with a clean slate.
First, fill a bucket with warm water and a gentle, automotive soap. This combination is effective yet mild enough to prevent damage to your car’s paint.
Use a soft sponge or a microfiber cloth to rub the sap-stained areas gently. The warm soapy water will help soften the tree sap, making it easier to remove without using excessive force that might scratch your paint.
If the sap doesn’t come off with gentle rubbing, don’t be tempted to scrub harder. Instead, consider applying a specialized sap remover designed for vehicles. These removers are formulated to target the sticky, resinous nature of tree sap without harming the underlying paint.
This method helps maintain your car’s aesthetic appeal and preserves the integrity of the paint and clear coat, ensuring it continues to look its best.
Applying Solvent Treatments
After completing the initial washing, you’ll find that applying solvent treatments is an effective next step to tackle any remaining tree sap on your vehicle.
Solvent treatments such as rubbing alcohol, hand sanitizer, WD-40, or commercial cleaners help efficiently dissolve stubborn tree sap residue. These products are designed to break down the sticky substances without harming your vehicle’s finish.
Start with rubbing alcohol, which is highly effective and gentle on car paints. Apply a small amount onto a clean rag and gently dab it on the sap spots.
Let it sit for a few minutes to break down the sap, then wipe away with a clean section of the cloth. If the sap persists, repeat the process, ensuring each step is performed with care to maintain the integrity of your vehicle’s surface.
For tougher spots, WD-40 or a commercial cleaner formulated for removing adhesives can be your go-to options.
Spray or apply a small amount directly onto the sap, allow it to work for a few minutes, and then gently scrub with a microfiber cloth. These solutions will help remove every last bit of residue, restoring your vehicle’s pristine condition.
Special Techniques for Windshields
How can you effectively remove tree sap from your vehicle’s windshield?
First, thoroughly wash the area to isolate the windshield sap stains. This step guarantees you’re only dealing with the sap, which is essential for effective removal.
Next, apply rubbing alcohol directly to the sap stains. Rubbing alcohol is excellent at breaking down the sap, helping to dissolve it quickly. Use a clean cloth to dab the alcohol onto the stains gently. Allow it to sit for a few minutes to penetrate and dissolve the sap effectively.
It’s time to employ more detailed techniques if the sap proves stubborn. Use a detailing razor blade cautiously. Hold the blade at an angle and gently scrape the sap off. This method should be used as a last resort to prevent scratching the glass.
For persistent windshield sap, consider switching to stronger solutions like acetone-based nail polish remover or commercial sap removers. These products are formulated to tackle tough residues and can be very effective.
Once all the sap is removed, wash the windshield again to ensure it’s completely clear. This final wash helps to restore peak visibility, ensuring you’re part of a community that values meticulous care and safety on the road.
Addressing Stubborn Sap Residue
While the methods mentioned previously can handle typical sap stains on windshields, you may need additional strategies for stubborn sap residue on your vehicle’s body.
When dealing with sticky tree sap that’s dried and hardened, start with Isopropyl Alcohol or Mineral Spirits. Apply a small amount to a microfiber cloth and gently dab the affected area. These sap removers are effective and usually safe for your car’s paint.
If the sap persists, it’s time to try a Clay Bar. This tool is fantastic for lifting off sap without scratching the surface. Knead the clay into a flat disc, spray the area with a lubricant, and gently glide the clay over the sap. You’ll feel it pulling the sap off.
For the most tenacious spots, WD-40 Spray can break down the sap’s grip. Spray directly onto the sap, let it sit for a few minutes, then wipe away with a clean cloth. If sap remains, Nail Polish Remover is a potent alternative, but be cautious—test it on a small, inconspicuous area first to make sure it doesn’t damage the paint.
Post-Cleaning Paint Protection
After you’ve successfully removed the tree sap from your vehicle, applying a protective wax to shield the paint is crucial.
Applying Protective Wax
After removing tree sap from your vehicle, it is important to apply a high-quality protective wax to shield the paint and enhance its shine. This step restores shine and protects car paint from future environmental assaults.
Let’s explore how you can effectively apply protective wax to maintain a glossy finish and prolong the life of your paint.
First, make sure your car is cool to the touch and parked in a shaded area. You’ll need a high-quality wax, a clean sponge or applicator pad, and a few microfiber towels. Apply a small amount of wax onto the applicator pad.
Using circular motions, spread the wax thinly and evenly over one section of your car at a time. Working in sections is essential to ensure the wax doesn’t dry out completely before you can buff it off.
Allow the wax to haze, which typically takes about five to ten minutes, depending on the product and weather conditions. Then, using a clean microfiber towel, buff the wax off with gentle, circular motions. This step removes excess wax and buffs the surface to a high shine.
Choosing Right Sealants
Selecting the appropriate sealant for your vehicle is essential to effectively safeguard the paint from environmental damage after removing tree sap. When you choose a high-quality sealant, you’re not just cleaning your car; you’re embracing a community of careful car owners who value long-term care and protection for their vehicles.
First, consider the type of sealant that best suits your car’s paint type. Sealants vary in formulation, with some offering specific benefits that might be more suitable for your vehicle. For best results, ensure the sealant you pick is compatible with your car’s finish.
Sealants create a protective barrier on your car’s paint, shielding it from UV rays, water spots, and other contaminants. This barrier not only helps maintain a glossy finish but also extends the paint life. Regular application is important; integrate it into your routine car maintenance to ensure continuous protection.
Professional Removal Options
For stubborn tree sap spots on your vehicle, consider hiring professional services like Bigs Mobile, which specialize in safe and effective removal techniques.
When you’re dealing with these persistent blemishes, it’s important to choose a team that understands the nuances of tree sap removal. Bigs Mobile has developed a reputation in Washington for expertly identifying the resin type and the most appropriate solutions.
Their car care services go beyond mere cleaning; they focus on car paint restoration to bring back your vehicle’s original luster without risking further damage to the exterior.
By employing safe removal methods, these professionals ensure that every trace of sap is eradicated, leaving a spotless finish. This enhances your car’s appearance and protects its value over time.
Conclusion
Now, gaze upon your gleaming vehicle, its surface pristine and unmarred by the sticky clutches of tree sap.
You’ve restored its lustrous shine through diligent washing, precise application of solvents, and careful scraping.
A layer of wax protects this rejuvenated beauty from the sun’s harsh rays and future sap assaults.
Your car now stands not only cleaner but fortified, ready to face clear skies and shady groves alike, its armor gleaming under the open sky.